Honeywell Home T6 Pro Install Manual: A Comprehensive Guide
This manual details the installation and operation of the Honeywell Home T6 Pro Smart Thermostat, covering system compatibility, wiring, and advanced features like Z-Wave and Wi-Fi.
The Honeywell Home T6 Pro Smart Thermostat represents a significant advancement in home climate control, offering programmable functionality alongside smart home integration capabilities. This thermostat is designed for ease of use, providing homeowners with enhanced comfort and potential energy savings. It’s compatible with a wide range of heating and cooling systems, including conventional and heat pump setups, though specific system requirements must be met – notably a 24 VAC power source (C wire) for optimal performance.
Available in both Z-Wave and Wi-Fi enabled models (T6 PRO Z-Wave and Lyric T6 PRO Wi-Fi), the T6 Pro allows for remote control and monitoring via compatible smart home platforms or the Honeywell Home app. This introduction will guide you through the installation process, system configuration, and key features of this versatile thermostat, ensuring a smooth and efficient setup experience.
Package Contents
Upon opening the Honeywell Home T6 Pro package, you should find the following components: the T6 PRO Thermostat itself (either Z-Wave or Wi-Fi enabled, such as TH6320WF2003 or TH6220WF2006 models), and the Universal Wall Plate (UWP) Mounting System, designed for straightforward installation. Included are essential installation guides – the Professional Install Guide (identified as 33-00153-07 & 33-00392-01, depending on the model).
These guides provide detailed wiring diagrams and step-by-step instructions. Verify all components are present before beginning installation. Missing parts should be reported to the retailer or Honeywell Home support. The package is designed to support up to 3 Heat/2 Cool Heat Pump Systems or 2 Heat/2 Cool Conventional Systems, ensuring broad compatibility for various home setups.
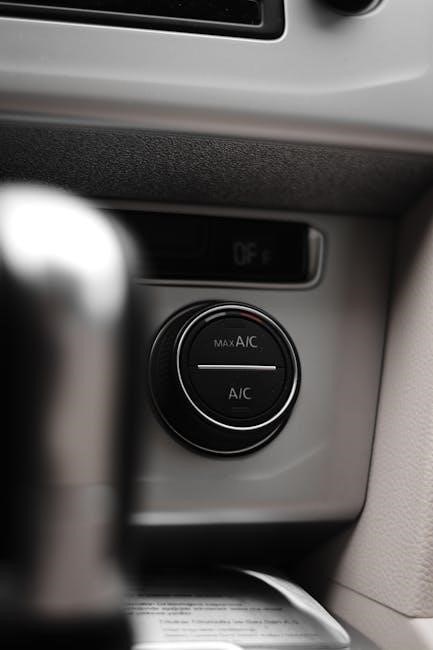
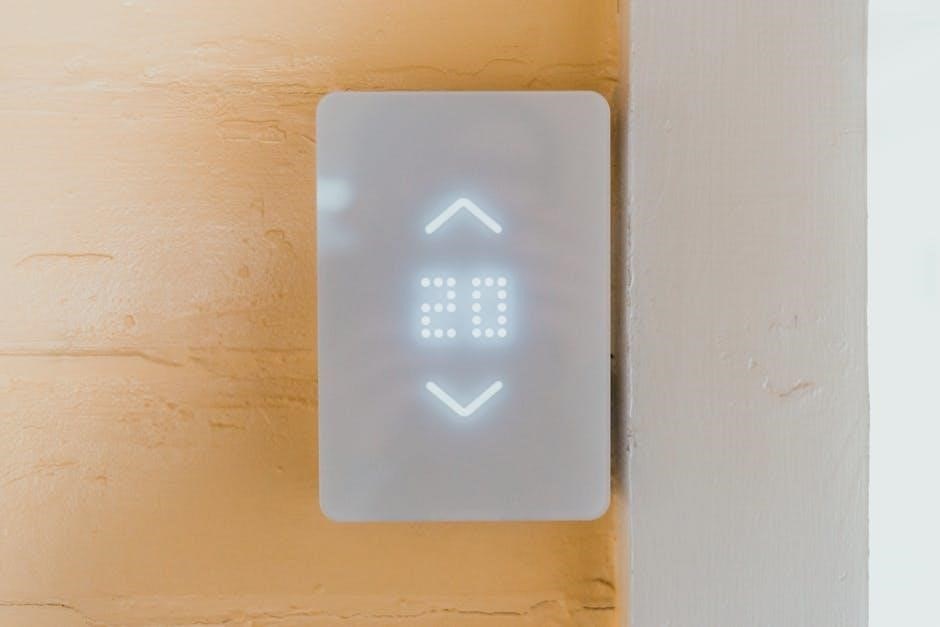
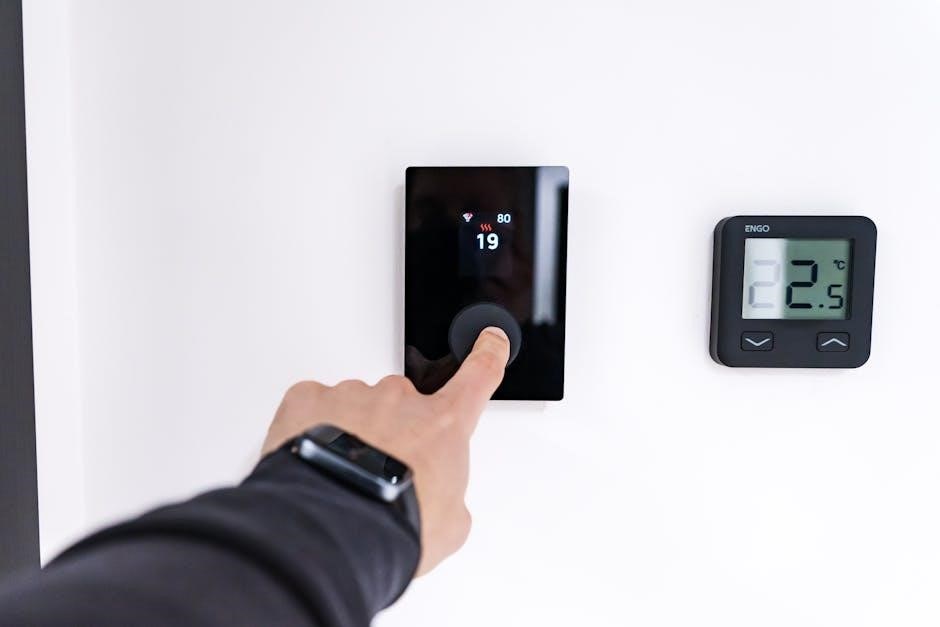
Thermostat Controls Overview
The Honeywell Home T6 Pro thermostat features an intuitive interface designed for ease of use. The display provides clear temperature readings, mode settings (Heat, Cool, Auto, Off), and fan control options. Navigation is typically managed through a combination of touchscreen controls and physical buttons, allowing for adjustments to schedules, Away mode, and system settings.
Users can access menus to configure Wi-Fi connectivity, Z-Wave network inclusion (for Z-Wave models), and air filter reminders. The thermostat also displays system status indicators, such as heating or cooling activation. Familiarizing yourself with these controls is crucial for optimal operation and customization of your home comfort settings.
System Compatibility
The Honeywell Home T6 Pro thermostat demonstrates broad compatibility with various heating and cooling systems, including conventional (single-stage and multi-stage) and heat pump configurations – supporting up to 3 heat and 2 cool stages. However, certain systems are explicitly incompatible.
Crucially, the T6 Pro requires a 24 VAC power source, commonly referred to as a “C wire”, for reliable operation. It is not suitable for electric baseboard heat (120-240V systems) or millivolt systems. Before installation, verify your existing system’s voltage and wiring to ensure seamless integration and avoid potential damage or malfunction. Proper compatibility is essential for optimal performance.
Compatible Heating Systems
The Honeywell T6 Pro seamlessly integrates with a wide array of heating systems, offering versatile control for optimal comfort. This includes gas furnaces, oil furnaces, and electric furnaces, provided they operate on a 24 VAC system. Support extends to both single-stage and multi-stage heating setups, allowing for precise temperature regulation.
Furthermore, the thermostat is compatible with heat pump systems utilizing auxiliary or emergency heat. It can effectively manage both forced-air and hydronic (hot water) heating systems. Confirming your system’s voltage and wiring configuration before installation is vital to ensure proper functionality and avoid any compatibility issues.
Compatible Cooling Systems
The Honeywell T6 Pro thermostat demonstrates broad compatibility with various cooling systems, enhancing home comfort during warmer months. It supports central air conditioning systems, including single-stage and multi-stage configurations, providing efficient temperature control. Compatibility extends to heat pump systems operating in cooling mode, seamlessly switching between heating and cooling as needed.
Additionally, the thermostat works effectively with dual-fuel systems, coordinating with both air conditioning and heating sources. It’s crucial to verify your cooling system operates on a standard 24 VAC power source for proper integration. Confirming compatibility before installation ensures optimal performance and prevents potential issues.
Systems Requiring 24 VAC Power (C Wire)
The Honeywell T6 Pro thermostat necessitates a 24 VAC power source, commonly referred to as a “C-wire,” for reliable operation. This wire provides continuous power to the thermostat, enabling its smart features and display functionality. Many modern HVAC systems already include a C-wire, simplifying the installation process. However, older systems might lack this wire, requiring professional assistance to add one.
Without a C-wire, the thermostat may experience intermittent power loss, leading to inaccurate readings or operational failures. Utilizing a C-wire adapter is an alternative solution, but professional installation is recommended to ensure correct wiring and system stability. Confirming the presence or feasibility of a C-wire is a critical step before proceeding with installation.
Incompatible Systems: Electric Baseboard Heat
The Honeywell Home T6 Pro thermostat is explicitly incompatible with electric baseboard heating systems operating at 120-240V. These systems utilize a different voltage and control mechanism than the T6 Pro is designed to handle, potentially causing damage to the thermostat or the heating system itself. Attempting to connect the T6 Pro to electric baseboard heat will not result in proper functionality and poses a safety risk.
Electric baseboard heaters typically require a direct line voltage connection, whereas the T6 Pro operates on low-voltage (24 VAC) signals; Alternative thermostats specifically designed for electric baseboard heat are available and should be used instead. Always verify system compatibility before purchasing a thermostat to avoid installation issues and ensure safe operation.
Incompatible Systems: Millivolt Systems
The Honeywell Home T6 Pro thermostat is not compatible with millivolt heating systems. Millivolt systems, commonly found in fireplaces or older heating setups, generate their own low voltage power and operate differently than standard 24 VAC systems. The T6 Pro requires a consistent 24 VAC power source to function correctly, which millivolt systems cannot provide.
Attempting to connect the T6 Pro to a millivolt system will result in the thermostat not operating and potentially causing damage to the system’s delicate components. Specialized thermostats designed specifically for millivolt applications are necessary for these types of heating systems. Always confirm your heating system’s voltage requirements before selecting a thermostat.
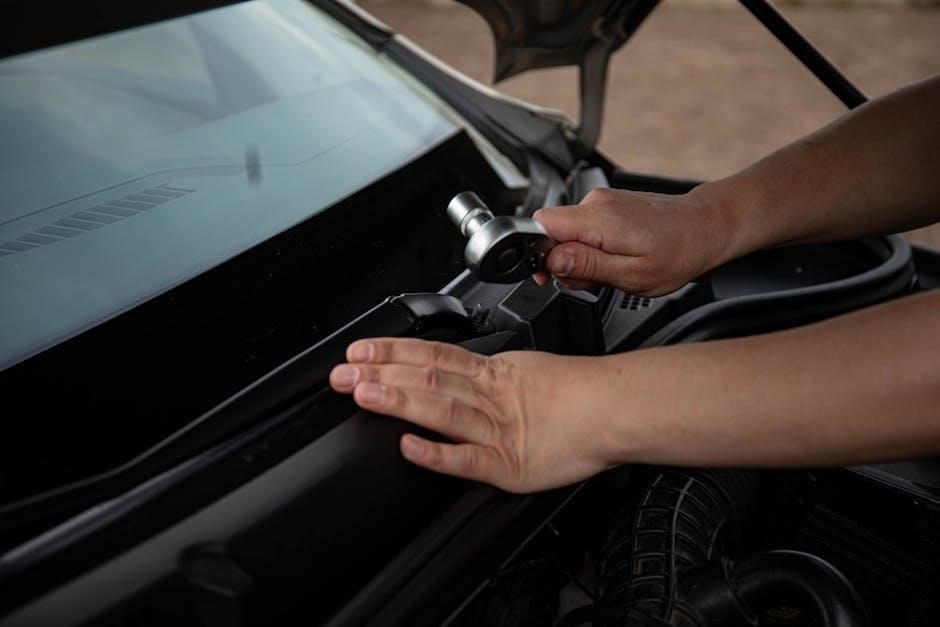
Installation Process
Proper installation is crucial for optimal performance of your Honeywell Home T6 Pro thermostat. The process begins with ensuring your system’s compatibility, followed by safely shutting off power to your HVAC system at the breaker. Next, remove your existing thermostat and carefully label the wires.
The T6 Pro utilizes the Universal Wireless Platform (UWP) mounting system, simplifying the physical installation. Once mounted, connect the wires to the appropriate terminals on the T6 Pro’s backplate, referencing the wiring diagram in the included professional install guide (33-00153-07 or 33-00392-01). Finally, attach the thermostat to the backplate and restore power.

UWP Mounting System Installation
The Universal Wireless Platform (UWP) mounting system streamlines the physical installation of your Honeywell Home T6 Pro thermostat. Begin by separating the backplate from the thermostat body. Position the backplate on the wall where your old thermostat was located, ensuring it’s level.
Use the provided screws and wall anchors (if needed) to securely fasten the backplate to the wall. The UWP system allows for flexible wiring access. Once the backplate is firmly mounted, you’re ready to proceed with wiring the thermostat, connecting the labeled wires to the corresponding terminals on the backplate.
Wiring the Thermostat
Carefully connect the wires from your heating and cooling system to the corresponding terminals on the T6 Pro’s backplate. Refer to the wiring diagram included in the professional install guide (33-00153-07 or 33-00392-01) for accurate connections.
A ‘C’ wire (24 VAC common wire) is typically required for consistent power. Ensure all connections are secure and that no bare wires are exposed. Double-check your wiring against the diagram before attaching the thermostat body to the backplate. Incorrect wiring can damage your system or the thermostat itself.
System Operation Settings
The T6 Pro offers customizable settings to optimize your comfort and energy savings. Access these settings through the thermostat’s menu. Fan operation settings allow you to choose between ‘Auto’ (fan runs only during heating/cooling) and ‘On’ (fan runs continuously).
For heat pump systems, configure settings for auxiliary heat and reversing valve operation. Conventional systems require configuration of heating and cooling stages. Proper configuration ensures efficient and reliable system performance. Explore the menu options to tailor the thermostat to your specific heating and cooling needs.
Fan Operation Settings
The Honeywell T6 Pro provides two primary fan operation modes: ‘Auto’ and ‘On’. Selecting ‘Auto’ instructs the fan to operate solely during heating or cooling cycles, enhancing energy efficiency and minimizing unnecessary runtime. Conversely, choosing ‘On’ maintains continuous fan operation, promoting consistent air circulation and potentially improving indoor air quality.
Access these settings via the thermostat’s main menu. Consider your comfort preferences and air quality needs when selecting a mode. Continuous fan operation can also help distribute temperature more evenly throughout your home. Experiment to determine the optimal setting for your specific environment and lifestyle.
Heat Pump System Configuration
When configuring the T6 Pro for a heat pump system, accurate setup is crucial for optimal performance. The thermostat supports up to 3 heat/2 cool stages, allowing for precise temperature control. During installation, carefully define your system type – whether it’s a standard heat pump or a dual-fuel system incorporating auxiliary heat.

Proper wiring is paramount; ensure correct connections for the heat pump, reversing valve, and auxiliary heat. The thermostat’s menu allows you to customize settings like balance point temperature, which dictates when auxiliary heat engages. Incorrect configuration can lead to inefficient operation or discomfort, so double-check all settings.
Conventional System Configuration
For conventional heating and cooling systems, the Honeywell T6 Pro offers straightforward configuration options. This thermostat supports up to 2 heat/2 cool stages, providing efficient climate control; During setup, clearly identify your system type – furnace, air conditioner, or a combination of both. Accurate identification ensures proper operation of heating and cooling cycles.
Verify correct wiring connections for the furnace, air conditioner, and common wire (C-wire, if applicable). The thermostat’s menu allows customization of settings like cycle rate and temperature differential. Incorrect settings can lead to short-cycling or temperature fluctuations, so careful attention to detail is essential for optimal performance.
Programming the Schedule
The Honeywell T6 Pro allows for customized scheduling to optimize comfort and energy savings. The thermostat offers pre-set default schedules, easily adjustable to fit your lifestyle. You can create unique programs for weekdays, weekends, or individual days, setting different temperatures for wake, leave, return, and sleep periods.
Access the scheduling menu through the thermostat interface or the Honeywell Home app. Common settings include setting back temperatures during unoccupied hours and comfort temperatures when at home. The schedule can be temporarily overridden with hold functions, providing immediate temperature adjustments without altering the programmed schedule permanently.
Default Schedule Settings
The Honeywell T6 Pro thermostat arrives with a pre-programmed schedule designed for common usage patterns. Typically, the default settings feature a “Wake” period with a comfortable temperature, followed by a “Leave” period with a setback temperature for energy conservation while the home is unoccupied. Upon returning (“Return” period), the temperature adjusts back to a comfortable level.
The “Sleep” period implements another setback temperature for overnight energy savings. These default settings are a starting point, easily customized to match individual preferences and daily routines. Users can view the default schedule within the thermostat’s menu or the Honeywell Home app, providing a clear understanding of the initial programming.
Adjusting the Thermostat Schedule
The Honeywell T6 Pro allows for flexible schedule adjustments directly on the thermostat or via the Honeywell Home mobile app. To modify a schedule, navigate to the “Schedule” option in the menu. Users can then select individual days or apply changes to all days simultaneously. Each period – Wake, Leave, Return, and Sleep – can be individually edited.
Adjustments include setting the desired temperature and the start time for each period. The app provides a visual interface for easy schedule management. Common adjustments involve shifting time blocks to align with changed routines or setting different temperatures for increased comfort or energy savings. Saving changes applies the new schedule immediately.
Common Schedule Settings
Typical T6 Pro schedules utilize distinct temperature settings for different times of day to optimize comfort and energy efficiency. A common setup involves a cooler temperature during “Sleep” and “Away” periods, reducing energy consumption while occupants are less active or absent. “Wake” and “Return” periods usually feature warmer temperatures for enhanced comfort.
Many users set back the temperature by 7-10 degrees Fahrenheit during these inactive periods. The default schedule provides a starting point, but customization is encouraged. Users often create unique schedules based on their lifestyles and preferences. Remember to save any changes made to ensure the thermostat follows the desired programming.
Z-Wave Integration
The T6 PRO Z-Wave thermostat seamlessly integrates into existing Z-Wave networks, enabling centralized control and automation of your home’s climate. This allows for remote access and control via Z-Wave hubs and compatible smart home platforms. The thermostat functions as a Z-Wave device, identified by a specific device class.
Z-Wave network inclusion is a straightforward process, typically initiated through the Z-Wave hub’s interface. Once included, the thermostat’s temperature settings and operational status can be monitored and adjusted remotely. This integration enhances convenience and provides opportunities for energy savings through automated climate control scenarios.
T6 PRO Z-Wave Thermostat Features
The T6 PRO Z-Wave thermostat offers a robust set of features when integrated into a Z-Wave network. It allows for remote temperature monitoring and control, enabling users to adjust settings from anywhere with a Z-Wave hub connection. The thermostat supports various operating modes, including heat, cool, and auto, all controllable via Z-Wave commands.
Furthermore, it provides real-time status updates, such as current temperature, humidity, and system mode, directly to the Z-Wave hub. This enables the creation of automated scenes and routines, like adjusting the temperature based on occupancy or time of day, maximizing comfort and energy efficiency.
Z-Wave Network Inclusion
To include the T6 PRO Z-Wave thermostat into your existing network, first, put your Z-Wave hub into inclusion mode, following the hub’s specific instructions. On the thermostat, navigate to the menu and select “Z-Wave” then “Include.” The thermostat will begin searching for a Z-Wave network.
Once the hub detects the thermostat, it will prompt you to confirm the inclusion. After confirmation, the thermostat will be added to your Z-Wave network and will appear in your hub’s device list. Ensure the thermostat is within range of the hub for a successful inclusion. The device class used by the T6 pro Z-Wave Thermostat is Thermostat General V2.
Wi-Fi Connectivity
The Lyric T6 PRO Wi-Fi thermostat requires a 2.4 GHz Wi-Fi network for connectivity. Begin the setup process through the Honeywell Home app, available for iOS and Android. Ensure your smartphone or tablet is connected to the desired Wi-Fi network.
Within the app, select “Add Device” and follow the on-screen instructions to put the thermostat into pairing mode. The app will guide you through entering your Wi-Fi credentials. Once connected, the thermostat will display a Wi-Fi icon, confirming successful connection. This enables remote control and access to advanced features via the Honeywell Home platform.
Lyric T6 PRO Wi-Fi Thermostat Setup
Initiate setup via the Honeywell Home app, ensuring your mobile device connects to a 2.4 GHz Wi-Fi network. Select “Add Device” and choose the T6 PRO Wi-Fi model. The app prompts putting the thermostat into pairing mode – typically holding a button until a specific icon appears.
Enter your Wi-Fi network name and password when requested. The app will then configure the thermostat, displaying a Wi-Fi symbol upon successful connection. Registration for a Honeywell Home account may be required. This setup unlocks remote access, scheduling, and integration with other smart home devices, enhancing convenience and energy management.
Away Mode Configuration
Access Away Mode through the thermostat’s MENU, then select “Away Setting”. This energy-saving feature adjusts the temperature automatically when you’re absent, reducing energy consumption. You can set a fixed Away temperature for both heating and cooling, overriding the programmed schedule.
Away Mode is adjustable, allowing customization to suit your preferences and climate. The default settings offer a balance between comfort and savings, but these can be modified. When activated, the thermostat schedule is temporarily suspended, maintaining the set Away temperature until you return and disable the mode. It’s a simple way to optimize energy use.
Energy Saving Features of Away Mode
Away Mode significantly reduces energy waste by maintaining a pre-set, energy-efficient temperature while you’re away from home. This prevents unnecessary heating or cooling of an unoccupied space, leading to substantial savings on utility bills. The thermostat intelligently overrides the programmed schedule, prioritizing energy conservation during your absence.
Customizable temperature settings allow you to fine-tune Away Mode for optimal efficiency. Lowering the heating temperature in winter and raising the cooling temperature in summer maximizes savings without compromising comfort upon your return. This feature is particularly beneficial for frequent travelers or those with irregular schedules, ensuring consistent energy reduction.
Air Filter Reminder
The Honeywell Home T6 Pro thermostat includes a helpful air filter reminder function, ensuring optimal HVAC system performance and indoor air quality. Regularly replacing your air filter is crucial for maintaining efficiency and preventing costly repairs. The thermostat tracks filter usage and prompts you when it’s time for a replacement, typically based on run-time hours.
You can customize the reminder settings to match your filter type and usage patterns. This feature prevents airflow restriction caused by a dirty filter, which can strain your system and increase energy consumption. Ignoring the reminder can lead to reduced heating/cooling capacity and potential equipment failure, so proactive filter changes are highly recommended.
Battery Replacement
While the Honeywell Home T6 Pro thermostat often operates with 24VAC power (C-wire), it also utilizes batteries as a backup, preserving settings during power outages. The thermostat will display a low battery warning when replacement is needed, typically indicated by a battery icon on the screen. It’s crucial to replace the batteries promptly to avoid losing programmed schedules and settings.
Use only new, alkaline batteries of the correct size (usually AA). Follow the polarity markings within the battery compartment. Replacing the batteries is a simple process, accessible through the thermostat’s front panel or designated battery compartment. Maintaining battery power ensures continued operation and prevents unexpected disruptions to your home’s climate control.
Troubleshooting
If your Honeywell Home T6 Pro thermostat experiences issues, several troubleshooting steps can resolve common problems. A blank screen often indicates a power issue; verify the circuit breaker supplying power to the heating/cooling system is active; Confirm the C-wire is correctly connected, as it’s essential for consistent power.
For connectivity problems, ensure your Wi-Fi network is functioning correctly and the thermostat is within range. If Z-Wave integration fails, review the inclusion process and check for network interference. Refer to the detailed electrical ratings in the manual for safe operation. If issues persist, consult the Honeywell Home support website or a qualified HVAC technician.
Blank Thermostat Screen Troubleshooting
A completely blank screen on your Honeywell T6 Pro thermostat usually points to a power supply issue. The first step is to check the circuit breaker or fuse box that controls your heating and cooling system, ensuring it hasn’t tripped or blown. A crucial component for reliable operation is the ‘C-wire’ (common wire), which provides continuous power.
Verify the C-wire is correctly connected at both the thermostat and the furnace/air handler. If a C-wire isn’t present, a C-wire adapter might be necessary. Double-check all wiring connections for looseness or corrosion. If the breaker and wiring are sound, contact a qualified HVAC professional for further assistance.
Electrical Ratings
The Honeywell Home T6 Pro thermostat is designed for low-voltage applications commonly found in residential heating and cooling systems. It operates on a 24 VAC (Volt-Alternating Current) power source, essential for compatibility with most standard HVAC setups. The thermostat’s internal components are rated to handle typical current draws associated with heating, cooling, and fan control circuits.
However, it’s crucial to understand that the T6 Pro is not compatible with high-voltage systems like electric baseboard heaters (120-240V) or millivolt systems. Attempting to connect it to these systems will cause damage and void the warranty. Always adhere to local electrical codes and consult a qualified HVAC technician if unsure about your system’s voltage requirements.
Reference Materials
For comprehensive support and detailed information regarding your Honeywell Home T6 Pro Smart Thermostat, several resources are readily available. The Honeywell Home T6 PRO SMART THERMOSTAT User MANUAL provides in-depth explanations of all features and functionalities, assisting with everyday operation and troubleshooting.
Additionally, the Professional Install Guide (documents 33-00153-07 & 33-00392-01) offers step-by-step instructions specifically tailored for HVAC professionals during installation. Online resources like thermostat.guide and thermostatpower.com also provide user guides and FAQs. These materials ensure a smooth installation process and optimal performance of your T6 Pro thermostat, maximizing energy savings and comfort.

Honeywell Home T6 PRO SMART THERMOSTAT User MANUAL
The official Honeywell Home T6 PRO SMART THERMOSTAT User MANUAL is your primary resource for understanding all aspects of your new thermostat. It details everything from initial setup and programming the schedule to utilizing advanced features like Z-Wave integration and Wi-Fi connectivity.
This manual provides clear instructions on configuring fan operation, heat pump systems, and conventional systems. It also includes vital troubleshooting steps, such as addressing a blank thermostat screen, and outlines electrical ratings for safety. Accessing this manual ensures you can fully leverage the T6 Pro’s capabilities for optimal home comfort and energy efficiency.
Professional Install Guide (33-00153-07 & 33-00392-01)
These Professional Install Guides, specifically documents 33-00153-07 and 33-00392-01, are crucial resources for installers ensuring a correct and efficient T6 Pro thermostat setup. They provide detailed wiring diagrams for various system configurations, including compatibility with heat pump and conventional heating/cooling systems.
The guides emphasize the necessity of a 24 VAC power source (C wire) for optimal functionality and clearly state incompatibility with electric baseboard heat and millivolt systems. They offer step-by-step instructions for UWP mounting system installation and comprehensive troubleshooting advice, aiding professionals in delivering a seamless installation experience.